
Minnetonka Wood Flooring has handled wood floor refinishing in Minnetonka, MN for more than 20 years, serving surrounding cities including Hopkins, Wayzata, St. Louis Park, Edina and Eden Prairie. We bring tired oak, maple and engineered floors back with either a screen and recoat or a full sand to bare wood, depending on what the floor actually needs.
The quote is where most of the value is. You get a written price per square foot for both a recoat and a full sand and refinish, listed next to each other, along with the finish chemistry, the cure time and the day furniture, rugs and pets can return.
We also measure before we price. The room’s relative humidity goes on the quote, engineered boards get their wear layer checked, and older houses are scheduled under the federal lead-safe work rule when sanding could disturb painted trim.
Residential and Commercial Wood Floor Refinishing
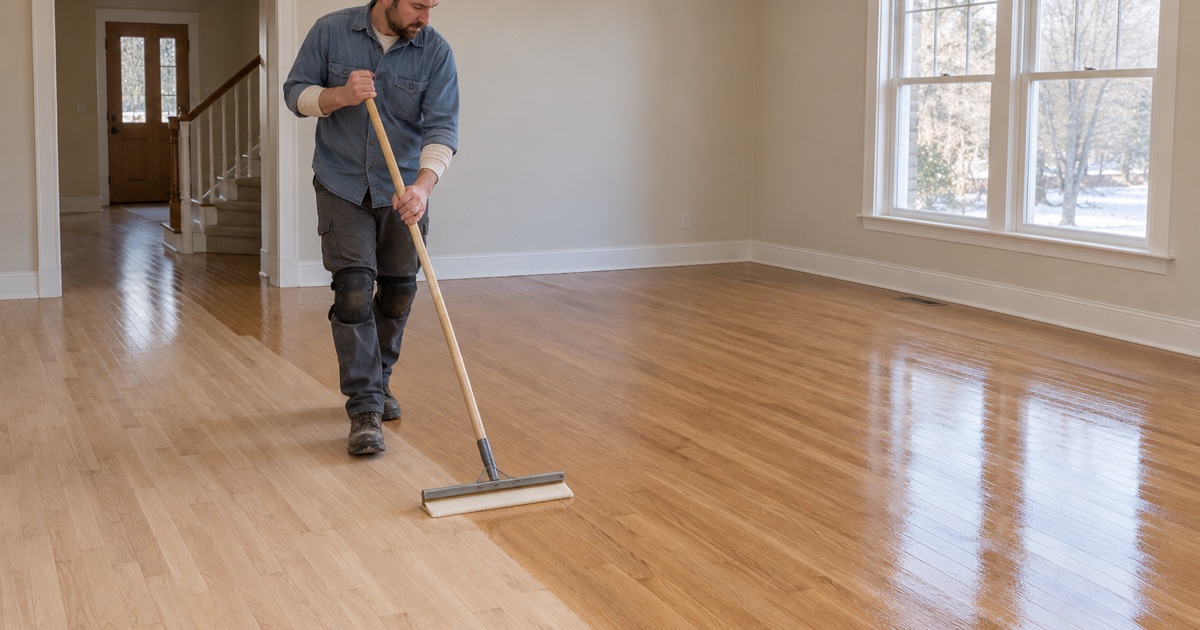
Refinishing Floors in Occupied Homes
Most of our refinishing is in lived-in houses, which means the schedule has to work around a family. We plan the rooms in an order that keeps a kitchen or a path to the bedrooms usable where possible, and we tell you in advance which days a room will be closed for sanding, coating and drying.
In a house with a living room, dining room and hallway all in one continuous floor, we usually refinish the connected area together. Stopping halfway across an open floor leaves a line where new finish meets old, and that line rarely disappears.
Refinishing Wood Floors in Commercial Spaces
Offices, shops, studios and restaurants with wood floors wear differently, with heavy lanes at entries and around counters. We schedule commercial refinishing around business hours where possible and choose finishes with dry times that fit a reopening date rather than a homeowner’s weekend.
Commercial floors often benefit from a regular screen and recoat before traffic reaches bare wood. That keeps sanding to a minimum and keeps the space open longer between full refinishing jobs.
Screen and Recoat or Full Sand and Refinish
When a Recoat Is Enough
A screen and recoat, sometimes called a buff and coat, abrades the existing finish with an abrasive screen on a buffer and adds a fresh coat. It works when the wear is in the finish rather than the wood: dull traffic areas, fine scratches and a finish that has simply lost its sheen.
The recoat only bonds to clean, compatible finish. Floors that have been waxed or treated with some polish products can reject a new coat, so we test adhesion in a small area first. If the test fails, we tell you before recommending a recoat that would peel.
When the Floor Needs Bare Wood
Gray traffic lanes, stains in the wood, deep scratches, water marks and a finish that is peeling or worn through all point to a full sand and refinish. Sanding to bare wood also gives you the chance to change the stain color or move from an ambered finish to a clearer one.
Cupped boards are a special case. If the cupping came from moisture, sanding them flat before the boards dry back toward their equilibrium moisture content will leave the floor crowned later. We find and fix the moisture first, then sand.
Engineered Floors and the Wear Layer
Engineered flooring can only be sanded through its top hardwood layer, and that layer varies widely between products. We remove a vent cover or check a threshold to measure it before promising a full sand. When the wear layer is too thin, a recoat is the safe choice, and we say so on the quote.
Our Step-by-Step Wood Floor Refinishing Process
Step 1: Measure the Floor and the Room
We measure square footage, read indoor relative humidity with a hygrometer, take moisture content readings on the boards, and check engineered wear layers. Those numbers decide whether the floor is ready to sand now or should wait, and they go on your written quote.
Step 2: Prepare and Contain the Work Area
Furniture comes out, vents and doorways are sealed with plastic, and quarter round or shoe molding is removed where it would block the edger. In pre-1978 houses, we set up dust containment under the EPA Renovation, Repair and Painting rule, with HEPA vacuums used throughout.
Step 3: Sand in Stages to Bare Wood
A full sand usually moves through a 36-50-80 grit sequence with a drum sander on the open floor and an edger along the walls. We finish with an abrasive screen or orbital sander to blend the edges and remove the scratch pattern, because chatter marks and swirl marks left at this stage show under every coat that follows.
Step 4: Stain, Seal and Coat
After vacuuming, we apply stain if you chose one, using water popping on oak when a darker, more even color is the goal. Then comes a sanding sealer or first coat and the finish coats, with light abrasion between coats inside the product’s recoat window.
Step 5: Cure, Return and Care
We reinstall trim, walk the floor with you, and leave written care notes. The written schedule tells you when socks are fine, when furniture with felt pads can return, and when rugs can go back down, which is the longest wait because the finish keeps curing beneath them.
Finishes, Stain and Color Choices
Waterborne, Oil-Modified and Hardwax Oil
Waterborne polyurethane dries quickly, stays clear and has a mild odor, which suits occupied homes and lighter colors. Oil-modified polyurethane warms the wood toward amber and takes longer between coats. Hardwax oil penetrates the wood and can be spot-repaired later, but it needs more regular maintenance.
We write the chosen chemistry, the number of coats, the dry time and the full cure time on the quote. A finish that looks dry after a few hours is not yet cured, and treating it as cured is how rugs leave marks and furniture leaves dents.
Stain on Red Oak, White Oak and Maple
Red oak takes stain fairly evenly but carries a pink undertone. White oak accepts both natural and darker tones well and is often chosen for gray and brown looks. Hard maple is dense and prone to stain blotching, so we often recommend a natural finish or a conditioner on maple floors.
Sheen and How It Wears
Sheen ranges from matte to gloss. Lower sheens hide scratches and dust better in busy rooms, while higher sheens show every mark but are easier to wipe clean. We put samples down in your light so you can choose with the room as it really looks.
Timing Refinishing in Minnetonka Houses
Furnace Season and Seasonal Gaps
In January, heated indoor air in a Minnetonka house usually sits below the thirty to fifty percent relative humidity range wood flooring is made for, so boards shrink and gaps open. Filling those seasonal gaps during a winter refinish just crushes the filler out when the boards swell again in summer.
We can refinish year-round, but we read the humidity first. If gaps are wide, we may suggest running a whole-house humidifier for a few weeks or planning the work for a season when the floor is closer to its normal size.
Older Oak and Lead-Safe Sanding
Close to half of Minnetonka’s housing units were built before 1980, and many of those houses have original oak strip floors that have already been sanded once or twice. We check how much wood is left above the tongue before another full sand, and we follow the federal lead-safe work rule in pre-1978 houses where sanding may disturb painted baseboard or trim.
- 20+ Years on Wood Floors
- Per-Square-Foot Written Quotes
- Stairs Priced Per Tread